Are you intimidated by some of the decluttering pictures you see on Pinterest and Instagram?
I’ll admit, a lot of them are pretty awesome.
They start with horrible, cluttered spaces and end up with bright, beautiful, clean results. However, in most of these pictures, a lot of moolah is being spent on the transformation.
I’m definitely not knocking spending money on organization products. If that’s what you want to do, then, by all means, do it. (Heck, I do it too sometimes.)
The good news, though, is that to reap the full benefits of decluttering (and there are many!), you don’t need to spend a dime. All you need to do is get rid of items you don’t use anymore.
Today I’m going to show you some realistic decluttering before and after pics I’ve taken of my home throughout the past year.
Decluttering Before and After Pics: Kitchen
With this project, I got rid of all the Tupperware that was broken or didn’t have a matching lid. I then organized what was left to make it neatly fit in the cabinet.
My cooking utensils drawer had been a source of frustration for years, yet instead of decluttering it, I’d spend 1-2 minutes trying to get the overstuffed drawer to shut! So, I finally did something about it.
I removed all the utensils that I never use (which was a lot) and kept only the useful items.
When you think of decluttering pics, you probably don’t think about the refrigerator. However, it’s items like these we use the most and get the biggest benefit from decluttering and cleaning.
Here I got rid of all expired items and stuff we’ll never eat. Then, I gave the fridge a good clean.
Accessing the cleaning supplies I used regularly was beginning to be a chore, so I gave this cabinet a good decluttering. I got rid of empty bottles and old products. I then wiped down the inside of the cabinet and organized my remaining supplies.
Decluttering Before and After: Bedroom
For this section, let’s start with my daughter’s old bedroom. We’ve since given her room a makeover, but I have a great pic of the old room at its peak cluttered stage.
Here’s a pic of the decluttered room:
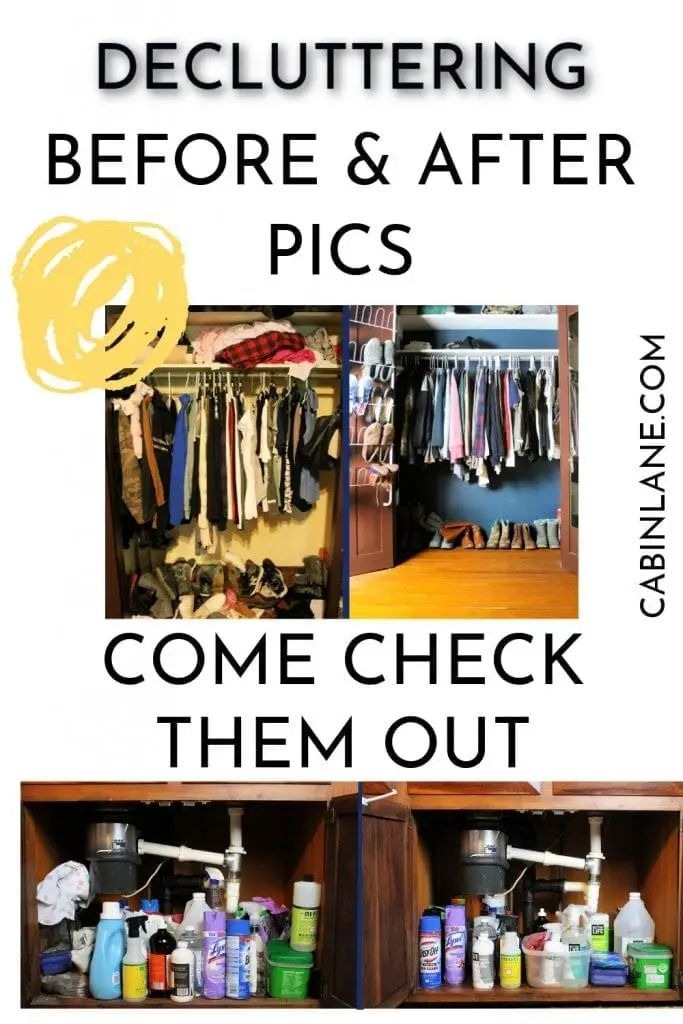
On a similar note, we can take a look at my closet during its peak cluttered stage:
For this project, I took EVERYTHING out of the closet. I then gave the closet a coat of paint.
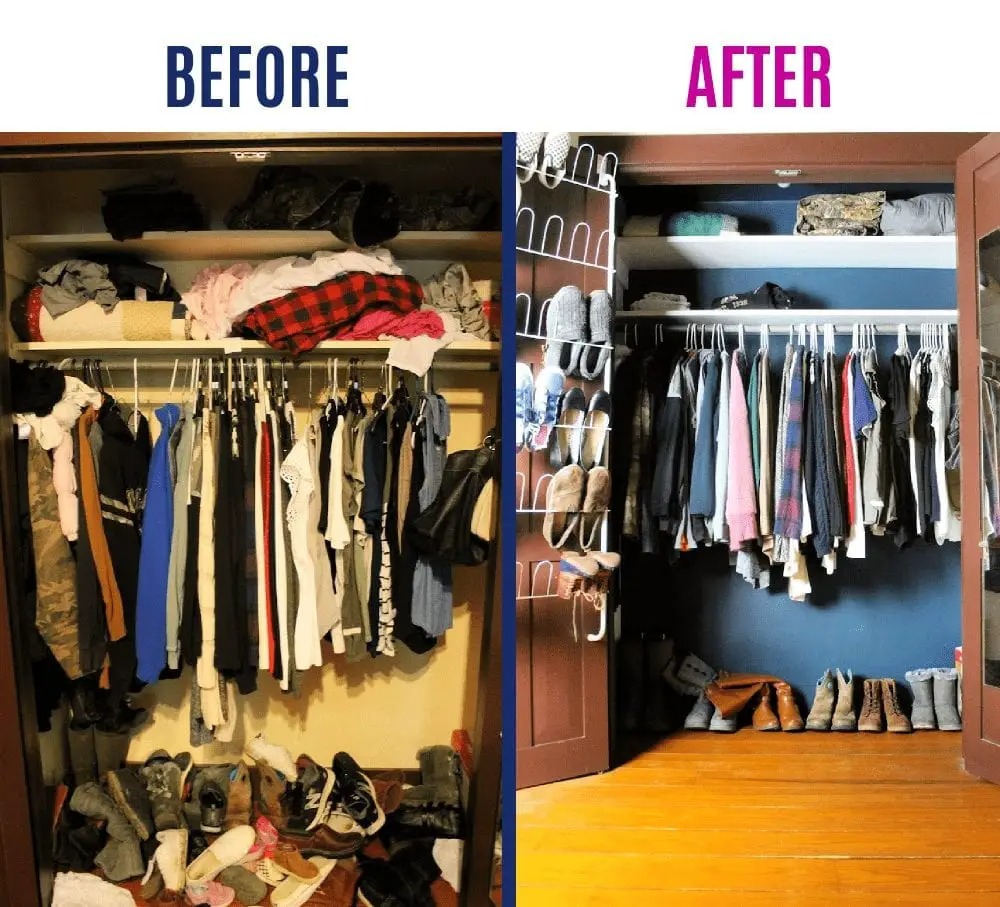
I got rid of all the clothes and shoes that I wore down, didn’t fit, or that I didn’t like.
Decluttering Before and After Pics: Miscellaneous
Here are a few more projects from around my house:
My kid’s craft supplies.
This was an easy project. I used bins from around the house to get everything organized.
This is our basement playroom.
In here, I got rid of trash bags full of toys. (And have since gotten rid of more.) I then threw the toys my daughter plays with into my favorite toy bins.
Our board game cabinet is a favorite for my three-year-old to destroy. It just needed a quick cleaning up.
Tips to Get Started Decluttering
I hope these decluttering before and after pics have shown that you don’t have to give your room or space a complete makeover to benefit from decluttering.
Here are my three favorite tips for getting started:
Work in Zones
Instead of saying you’ll declutter the kitchen today, break it down even further. Work in zones in the kitchen.
You can declutter your pantry, Tupperware, pots and pans, refrigerator, etc.
Give yourself manageable assignments instead of trying to tackle everything at once.
Declutter and Organize Based on YOUR Needs
I see too many people trying to follow others’ exact steps and getting hung up when the process doesn’t work.
Here’s the good news: you don’t need to “Marie Kondo” or “Home Edit” your house.
Declutter the items that you don’t find useful anymore and organize the rest. No fancy system is needed.
Be Realistic
Once you go through your entire house once, you’ll likely need to do it again to really weed out all the items you don’t want anymore.
That’s normal.
As long you’re consistent, you’ll get through everything. Be realistic with your expectations.