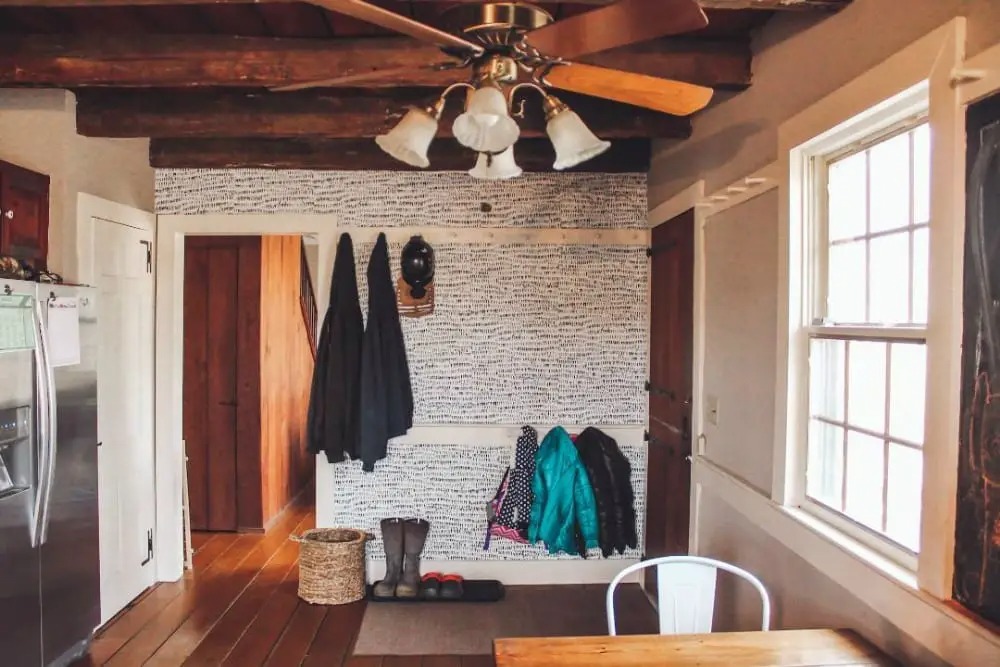
In my old project list, one of the things I wanted to do was install removable wallpaper. I had originally decided to do the hallway and dining room, but changed my mind and added some wallpaper to our entryway.
Since our entryway is the kitchen, I thought adding wallpaper would be a good way to give the space some definition.
I chose NuWallpaper from Wall Pops. I got the Kylver, which was only $39 per roll.
(There were some other styles from different brands that I liked better (like this one), but those were outrageously expensive. Who would’ve thought that peel-and-stick wallpaper could cost that much?!)
Installing the Wallpaper
I’ve never installed wallpaper, so I was a bit nervous about getting started. Once I got started, though, I learned that there was nothing to be worried about – it was 100% easy.
There was one thing about this wallpaper that was a bit tricky – you can’t match it up. It’s darn near impossible to match random dots, so I did the best I could. (Wallpaper with repeating patterns would be easy to match up.)
Other things I learned:
- If you mess up, it’s straightforward to reposition.
- It didn’t pull any of the paint off the wall after being repositioned.
- It seems like it would be super easy to remove if you got tired of it.
How to Hang Up Removable Wallpaper
If you’ve never installed removable wallpaper, you’ll need a smoother and a utility knife. (I used this Exacto Knife.)
Step 1 – Clean your wall.
Clean your wall off. My wall wasn’t terribly dirty, so I just wiped it down with a wet washrag and then air dry.
Step 2 – Start wallpapering.
Start at one end of the wall so that you can use the corner as a guide. (Although it’s important to note that your walls probably aren’t completely level.)
Leave 3-5 inches of extra paper at the top and bottom.
Pull the backing off and expose just a few inches of the wallpaper at a time. This will help you keep the paper straight and prevent the bottom from sticking to the wall.
Smooth out air bubbles as you go.
Step 3 – Match up the pattern.
Repeat the previous steps matching up the pattern as you go.
(Remember, if you mess up, it’s easy to reposition.)
Step 4 – Trim off the edges.
Once your wall is done, you can go back and trim off the excess paper. I used my smoother as a straight edge and ran the Exacto Knife over it.